Access & Overview
After completing the initial setup, you can manage and monitor your Smart Mirror from any computer or laptop connected to the same network.
1. Accessing the Dashboard
💡 Tip: Due to the mirror’s limited onboard performance, we hardly recommend managing configurations from a computer rather than directly on the device.
- Find the IP address displayed on your mirror after Wi-Fi setup. (You may already noted it earlier or you can also look it up in your Wi-Fi Network Settings)
- On your computer, open a browser and enter: http://(IP-Adress):8081
- Log in using the default password: changeme (if you have not already changed it)
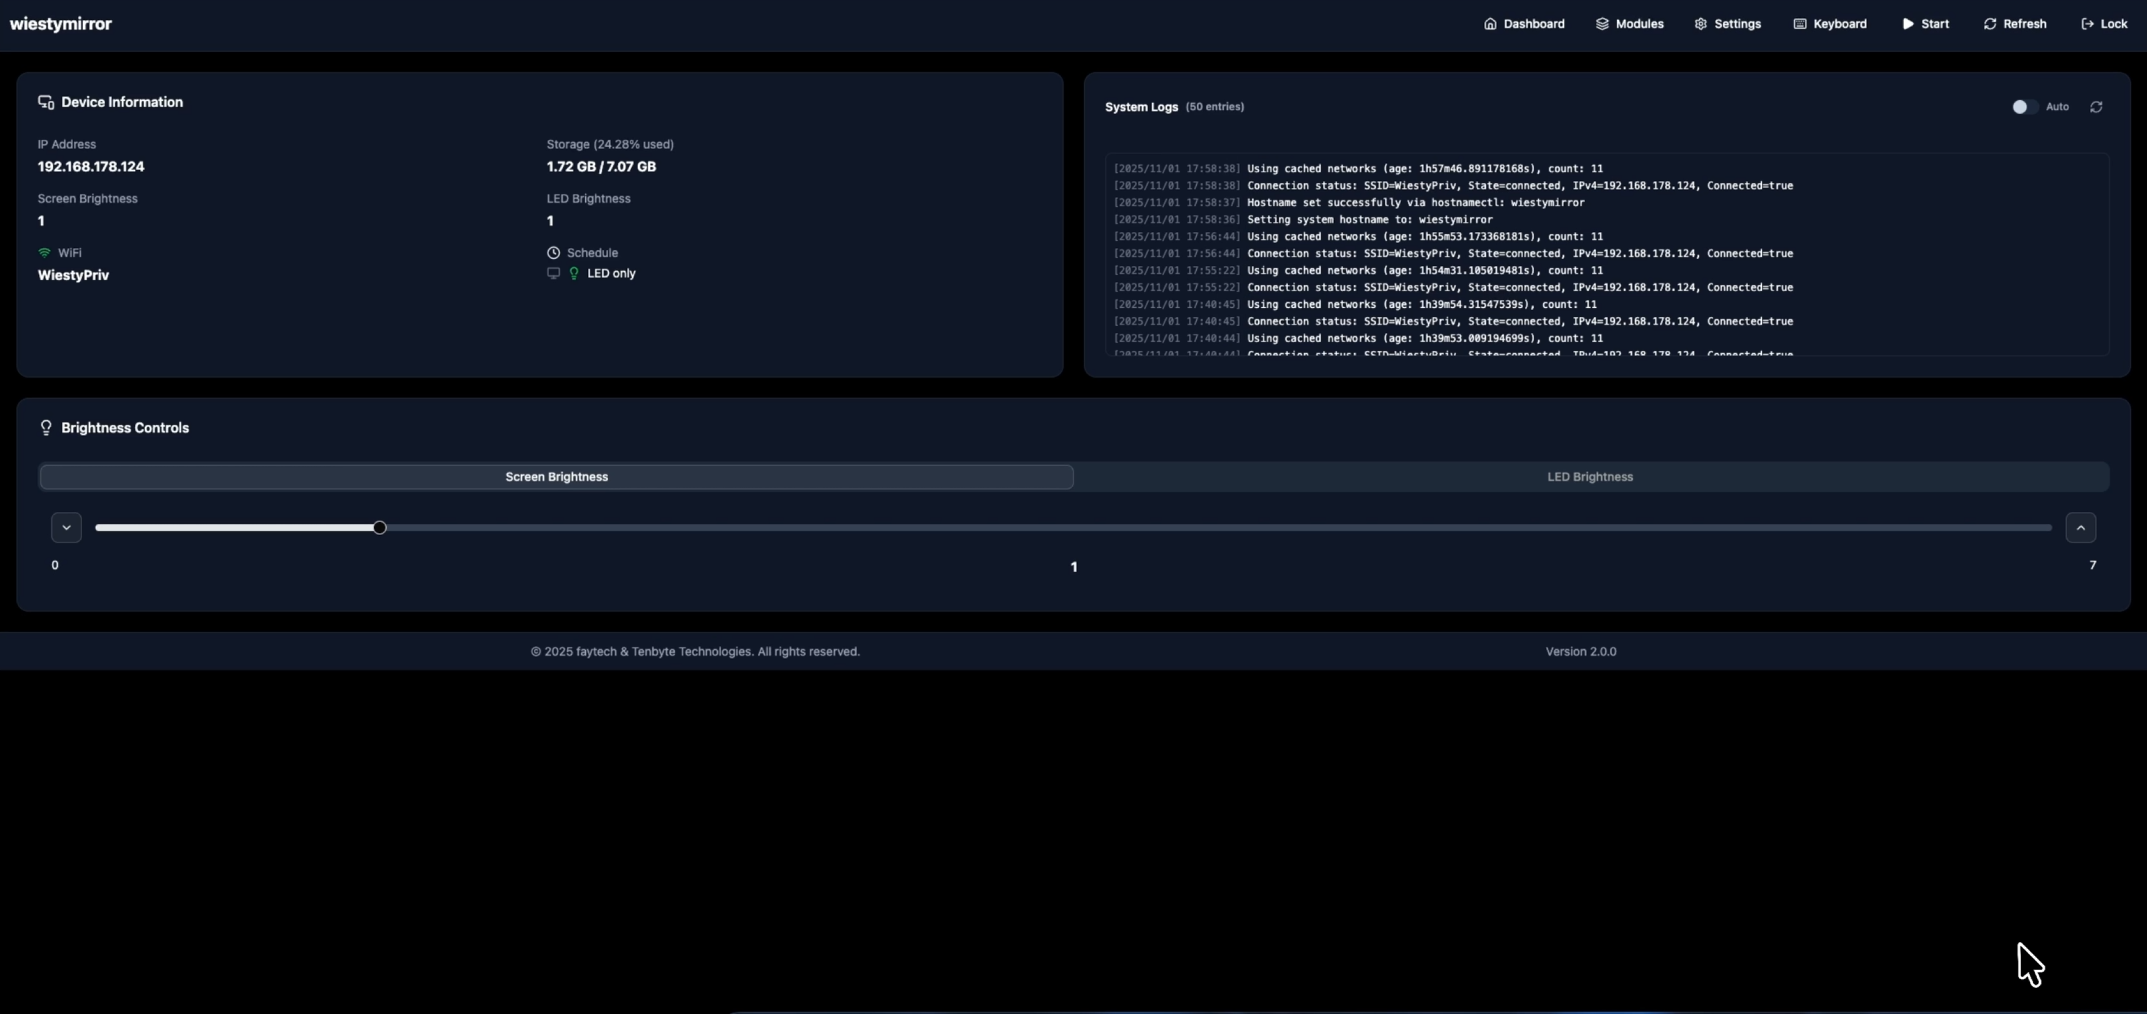
Once logged in, you’ll see the main dashboard interface.
2. Dashboard Overview
The dashboard provides quick access to key system information and controls.
Device Information
Displays:
- IP Address
- Storage usage
- Wi-Fi network name
- Screen and LED brightness
- System version
Brightness Controls
Adjust:
- Screen Brightness — controls the display intensity.
- LED Brightness — controls the light frame around the mirror.
Use the sliders to set values between 0–7.
System Logs
The System Logs panel shows connection and system events (e.g., Wi-Fi connections, hostname updates).
These logs are mostly informational and can usually be ignored unless troubleshooting.
3. Toolbar Actions
Top-right controls:
- Dashboard / Modules / Settings / Keyboard — switch between management sections.
- Start — performs a full reboot of the mirror.
- Refresh — restarts the kiosk browser on the mirror without restarting the full device.
- Lock — logout the device from the dashboard.
You can now continue to Modules to learn how to add new MagicMirror or custom components changing and affecting what is displayed on the MagicMirror.